My friends, I think it’s time for a new food movement. Perhaps you’ve heard something of the snout-to-tail cooking philosophy, a food trend that seeks to put every part of an animal to culinary use. I propose that it’s time for a similar movement in the vegetable world. I’m calling it Top-to-Tail.
Perhaps there already is such a movement. As a mom whose knowledge about world events only extends to what I read about Princess Kate at the grocery store check-out stand, I don’t really have time to keep up with such things. Anyway, this is the way we’ve been eating from the garden this year, and it’s been adventurous and delicious. Our first foray into Top-to-Tail eating? Turnips.
“Really?” you might well ask. “Turnips? In July?”
I admit that I do not typically find myself craving a turnip during a sweltering July evening. But when the garden yields up turnips (months before I expected it to, I might add) I cook turnips. And while I think we are all fairly well-acquainted with the end of the turnip that grows underground, I will hazard a guess that we are not as well-acquainted with the other end of the turnip.
Turnip greens might not immediately strike you as being edible. At all. They’re prickly, and tough, and a favorite of the caterpillars and flea beetles. But these greens have a nutritional profile that is seriously worth your attention. Among the more stellar nutritional qualifications are cancer-prevention, detox support, antioxidant benefits, anti-inflammatory benefits, cardiovascular support, and digestive support. (You can read the full nutritional profile here.) With a resume like that, I think turnip greens could easily push kale off of the superfood charts.
There is, of course, a gustatory cost for all of those health benefits. If you have a hard time swallowing kale, then you’re really going to struggle to swallow turnip greens. The prickles will soften when the greens are cooked and they aren’t noticeable, but the flavor remains decidedly bitter and the greens decidedly tough. For this reason, most recipes for turnips do not call for the greens. If they do use the greens, they are cooked for hours until mushy and perhaps 3/4 of those nutritional benefits have been destroyed. And even the ones that dare to use the greens, will still discard the stems. But I wanted to utilize the whole turnip, and reap as many health benefits as possible.
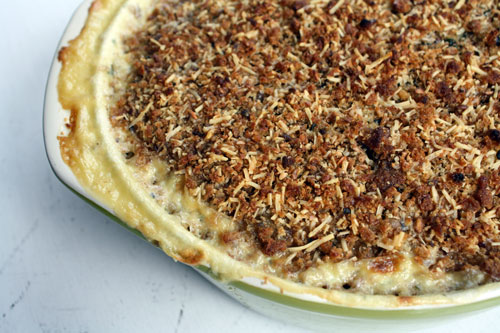
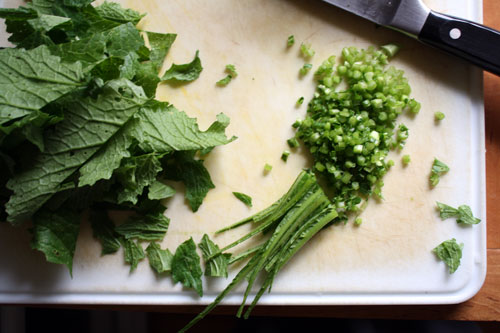
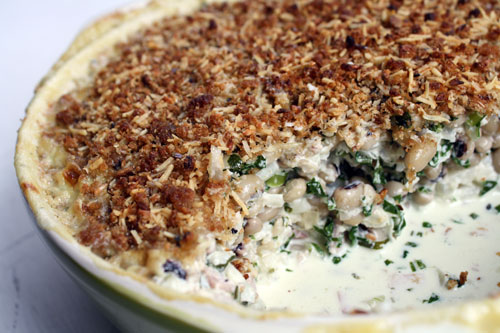
My cassoulet recipe, a Southern take on the classic French dish, does just that. I add ham, cream, and a bit of cheese to round out the flavor profile. I shred the greens into a fine chiffonade so they are easier to chew. And I chop and cook the stems separately so that they will be cooked until just tender. And while the greens are cooked enough to be palatable (not even our Super-Taster Sweet Pea complained about them), they are not cooked into oblivion.
The result is a creamy, hearty dish worthy of any French peasant family.
If you balk at the idea of turnips in July, you can tuck this recipe away until the days turn crisp and cool and the turnips sweeten with a bit of frost. I plan to revisit it again in the fall, after harvesting a new crop of turnips.
Top to Tail Turnip Cassoulet
Source: www.plantoeat.com
Course: Main Course
Serves:
Ingredients
- 2 1⁄2 cups dried black-eyed peas soaked overnight
- 5 small turnips with tops
- 2 Tbs organic butter
- 1 small-ish white onion chopped
- 2 cloves organic garlic minced
- 4 slices organic ham cubed
- sea salt and pepper to taste
- 1⁄2-1 pint organic heavy whipping cream
- 1 sprig fresh rosemary
- 4 sprigs fresh thyme
- 1⁄2 cup Parmesan cheese grated
- 1 1⁄2 cups fresh breadcrumbs
- olive oil for drizzling
Directions
- Drain and rinse the soaked beans. Place them in a large pot and cover with plenty of water; skim any foam off of the top while they’re cooking. Boil until tender, about 45 minutes. Drain, rinse well, and place into a large bowl.
- Preheat the oven to 400. Place a cookie sheet on a rack placed in the upper half of the oven.
- Wash and trim the turnips, separating the tops from the roots. Dice the turnips into chunks. Boil the turnips in plenty of water on the stove-top until soft, about 30 minutes. Drain and rinse the turnips, then return them to the pot. Mash them with a potato masher until they are your desired consistency (I like them a little chunky, but I suppose some might prefer them smoother. Your call) Add the mashed turnips to the bowl of beans; mix together.
- Now let’s deal with those turnip tops. Run a sharp knife down either side of the stem, separating it from the leafy part. Stack the stems and chop them. Set aside. Stack the leaves and roll them up; slice them into a thin chiffonade. Set aside.
- Warm a pot on the stove-top and melt the butter. Add the onion, garlic, and ham and saute until the onion is softened. Add the turnip-top stems and saute for a few minutes until softened. Add the leaves and saute for 3-5 more minutes. Add the turnip green mixture to the beans and turnips; stir to combine.
- Pour the whipping cream into the bowl until it reaches your desired consistency. My husband likes it on the soupy side, but the kiddos like it more “meaty”. Do whatever gives you peace at the dinner table. Pour the bean mixture into a large casserole dish.
- Strip the leaves from the rosemary and the thyme. Place them in a food processor with the Parmesan and the breadcrumbs. Pulse until combined. Sprinkle the breadcrumb mixture on top of the beans. Drizzle with a few glugs of olive oil.
- Place the casserole dish on the cookie sheet (the cookie sheet catches any juice that bubbles over). Bake until brown and toasty on top and bubbly on the sides, about 30 minutes. Let cool for at least 10 minutes before serving.


